
AI Tile Design Generator
Tile is the one surface where you design a single unit and then buy a whole field of it, so the thing that decides how it looks is not the tile at all — it is the joint between them, repeated a thousand times. This AI tile design generator shows you the field in about twenty seconds, and is straight with you about the three things it invents: the repeat, the scale, and the grout colour you asked for.
Start Designing FreeTry the AI Tile Design Generator — Free
Choose the kind of tile first, because a gloss herringbone backsplash, a patterned encaustic floor and a large-format stone-look slab are different products rather than different colours — they differ in body, in format, in what they can legally be walked on and in what a tiler charges to lay them. Five presets show the tile as a laid field; the sixth stands one tile against a dark wall so the face, the edge and the finish are the subject. Every preset keeps the surface dry, clear and free of clutter, which is what usually ruins a tile render.
AI Tile Design Generator
Pick a tile type, describe the pattern, format, finish and grout, and get tile and surface shots at up to 4K
Surfaces Made With This AI Tile Design Generator
These came out of the presets above, flaws included, and the captions say what each one gets right and what it quietly invents. Read them as a set and a pattern emerges. Colour, motif and finish are excellent — this is a model that genuinely understands what a glazed surface looks like. The grid underneath is not: tile sizes drift mid-image, a herringbone comes back as a chevron, stars that should be identical are each drawn slightly differently, and in the grout test the model changed the wrong variable entirely. Judge the surface, never the setting-out.
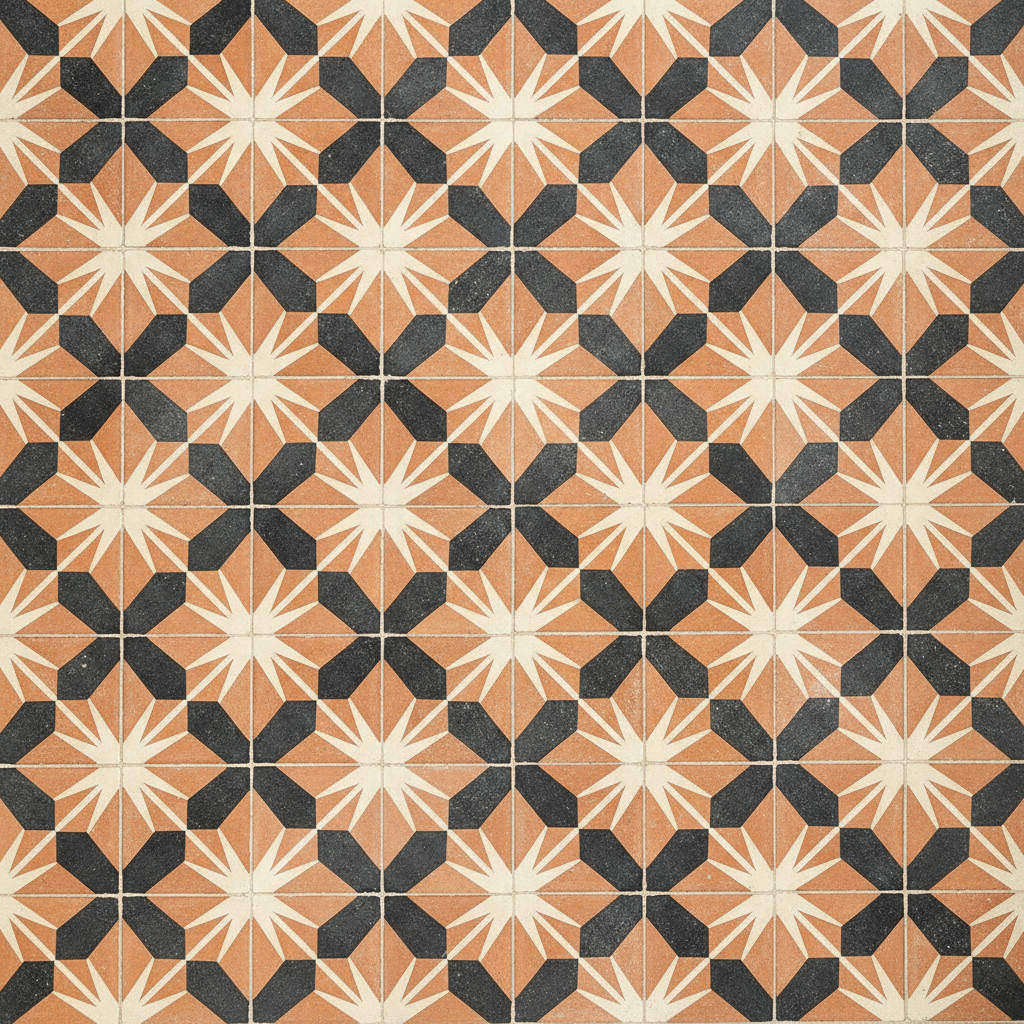
Encaustic cement floor tile in terracotta, ink black and chalk cream, shot from directly overhead, and the best picture on the page for one specific reason: the motif is not contained inside a tile. Each square carries a quarter of a star, and the star only exists once four tiles are laid together, which is the whole argument of this page in a single floor. Look closer and the limit appears too. Real encaustic tile is one unit repeated exactly, and here the stars are all slightly different — spoke lengths vary, some points are fatter than their neighbours, and the field never quite repeats. What the AI tile design generator has drawn is a photograph of a floor that looks like a repeat, not the repeating unit a factory would need
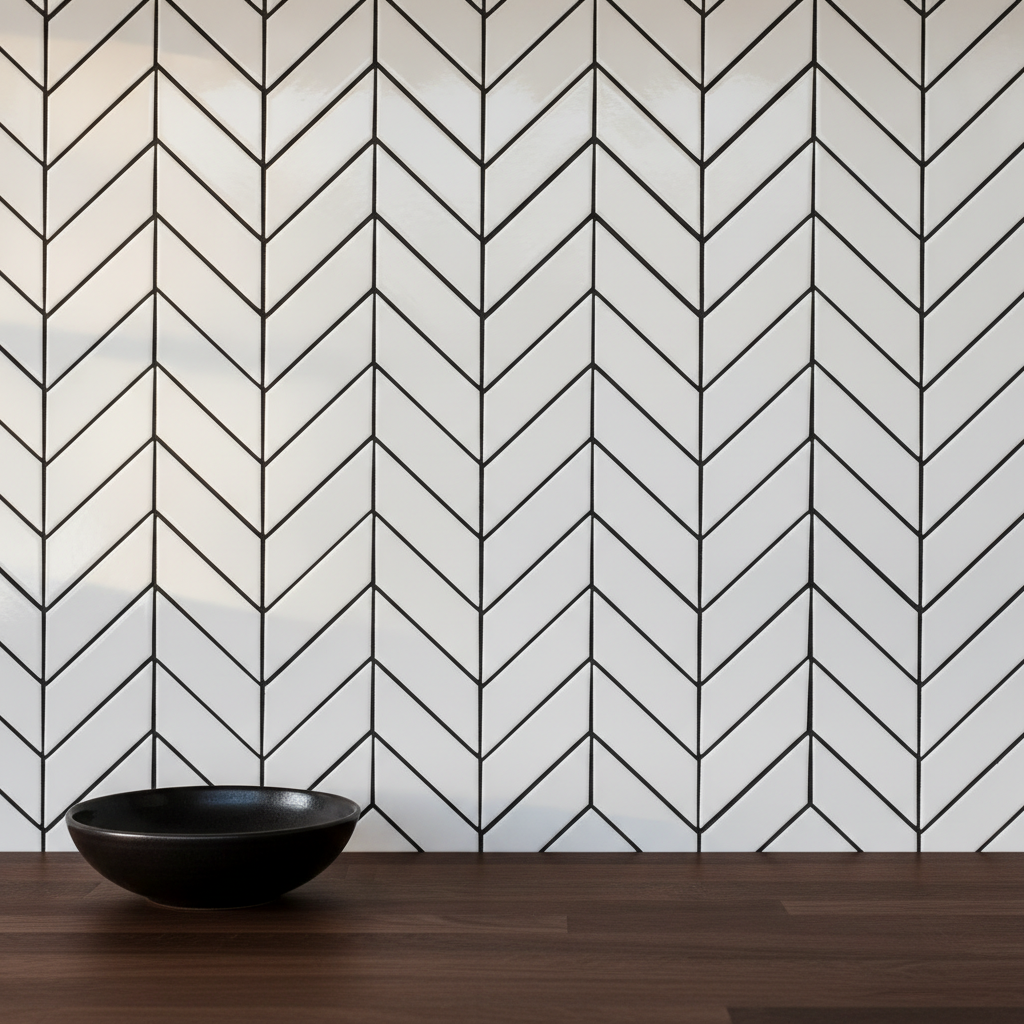
White gloss tiles in a black-grouted zig-zag above a walnut worktop, and two lessons in one picture. This is the second attempt. The first asked for exactly the same thing and returned a nearly white-on-white wall with thin mid-grey joints, because grout colour is the instruction this model drops most readily; saying near-black twice and specifying four-millimetre joints fixed it outright, and the field now reads the way a dark-grouted wall actually does. What the retry did not fix is the pattern name. This is chevron, not herringbone: the tiles are cut on an angle so they meet point to point in continuous columns, where a true herringbone is rectangular tiles meeting at ninety degrees. They look alike in a thumbnail, they are different products, and the cut ones cost more to buy and more to lay
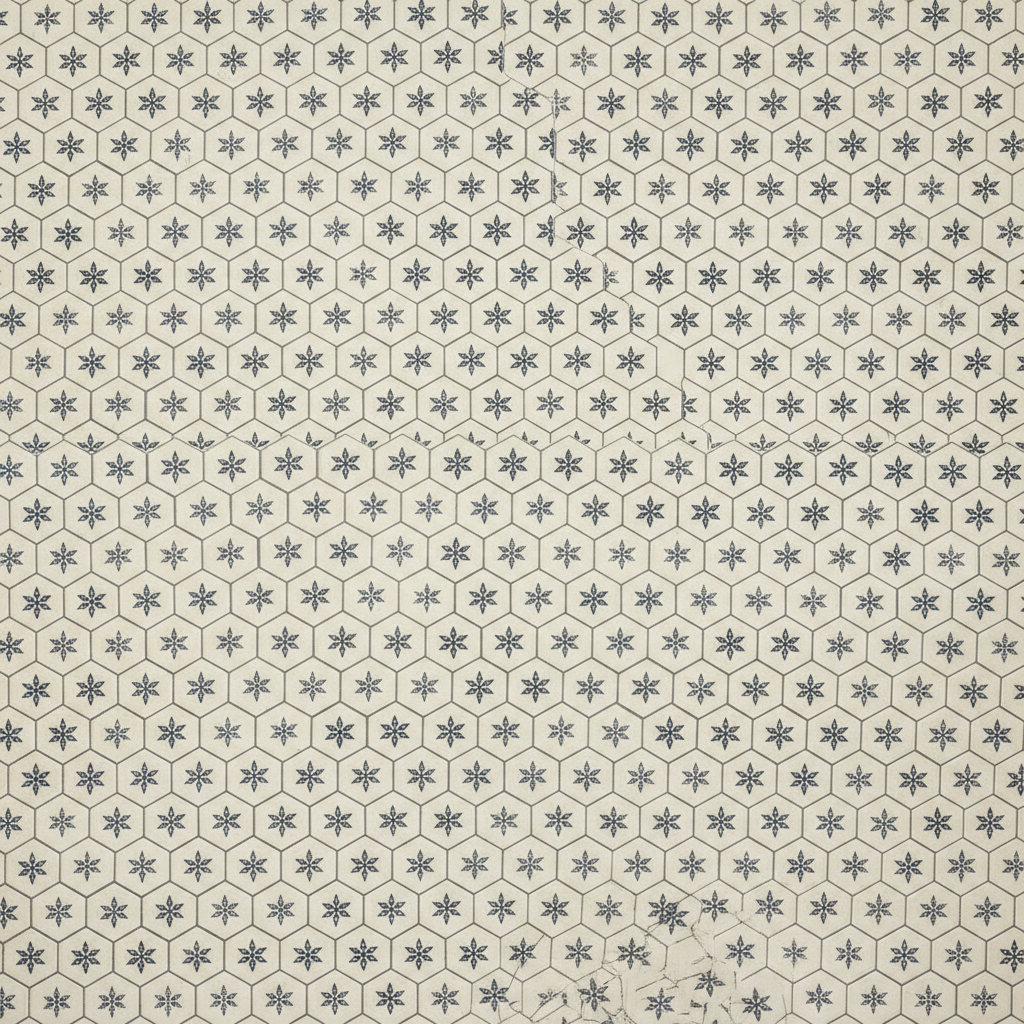
A hexagon floor in a small navy motif on a warm off-white body, printed the way an old bathroom would have been. It reads beautifully at a glance and falls apart as a setting-out plan the moment you look for the grid. Run your eye across the upper third and the hexagons are visibly larger than the ones below them, with a seam where one scale stops and another starts, so this is not one floor at one tile size but two pretending to be. The grout came back as a dark hairline rather than the pale grey that was asked for, and the bottom right corner has crazed into cracks nobody requested. A convincing texture, not a layout
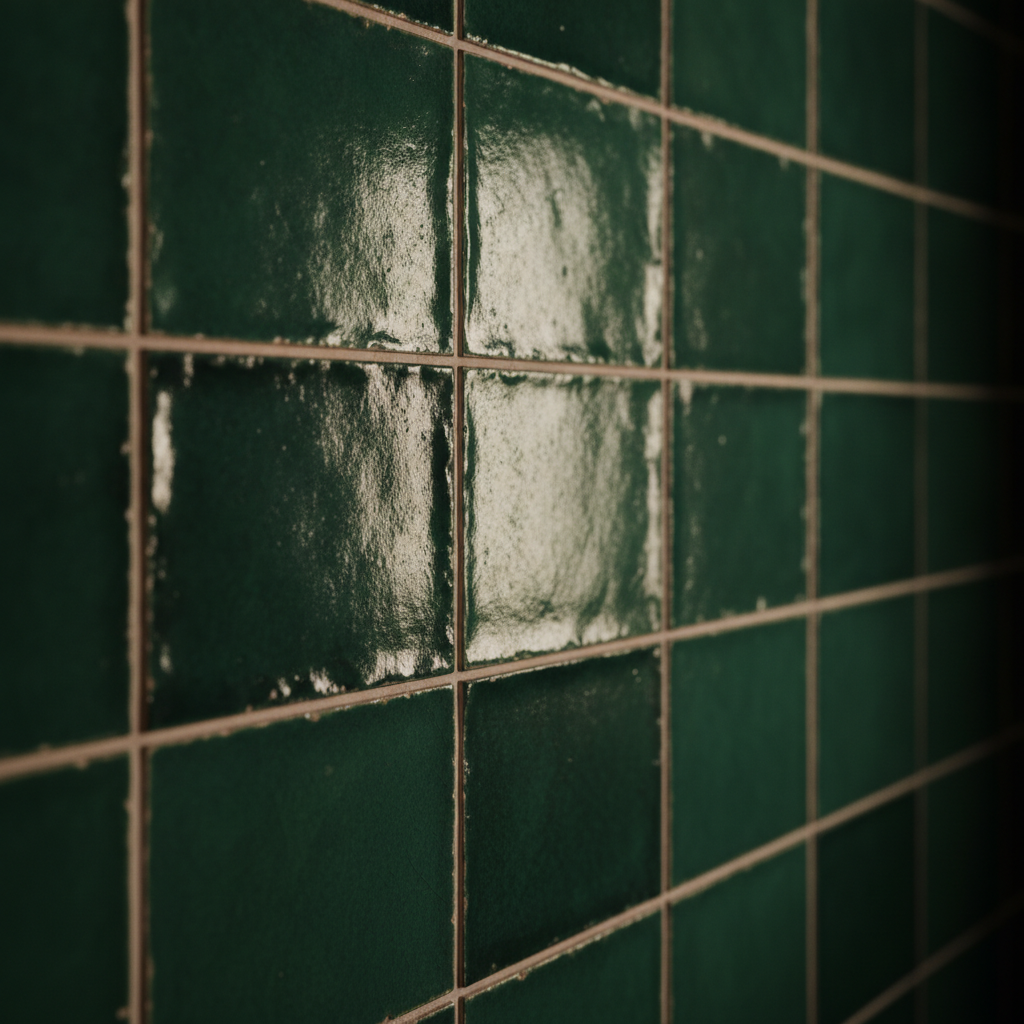
Deep emerald handmade-look wall tiles raking away from the camera under low side light, with the gloss pooling in patches exactly as a thick glaze does. The finish is the success here and the shape is the failure. Zellige is defined by its irregularity — wavy edges, no two tiles the same, joints that wander — and the brief asked for that in as many words. What arrived is a machine-straight grid with painterly variation printed onto it, which is a different product entirely. The sandy grout is coarse and slightly crumbling in places, and the bright window reflection sitting across the middle tiles is a free reminder that a gloss glaze shows you the room, including the light you were not planning on
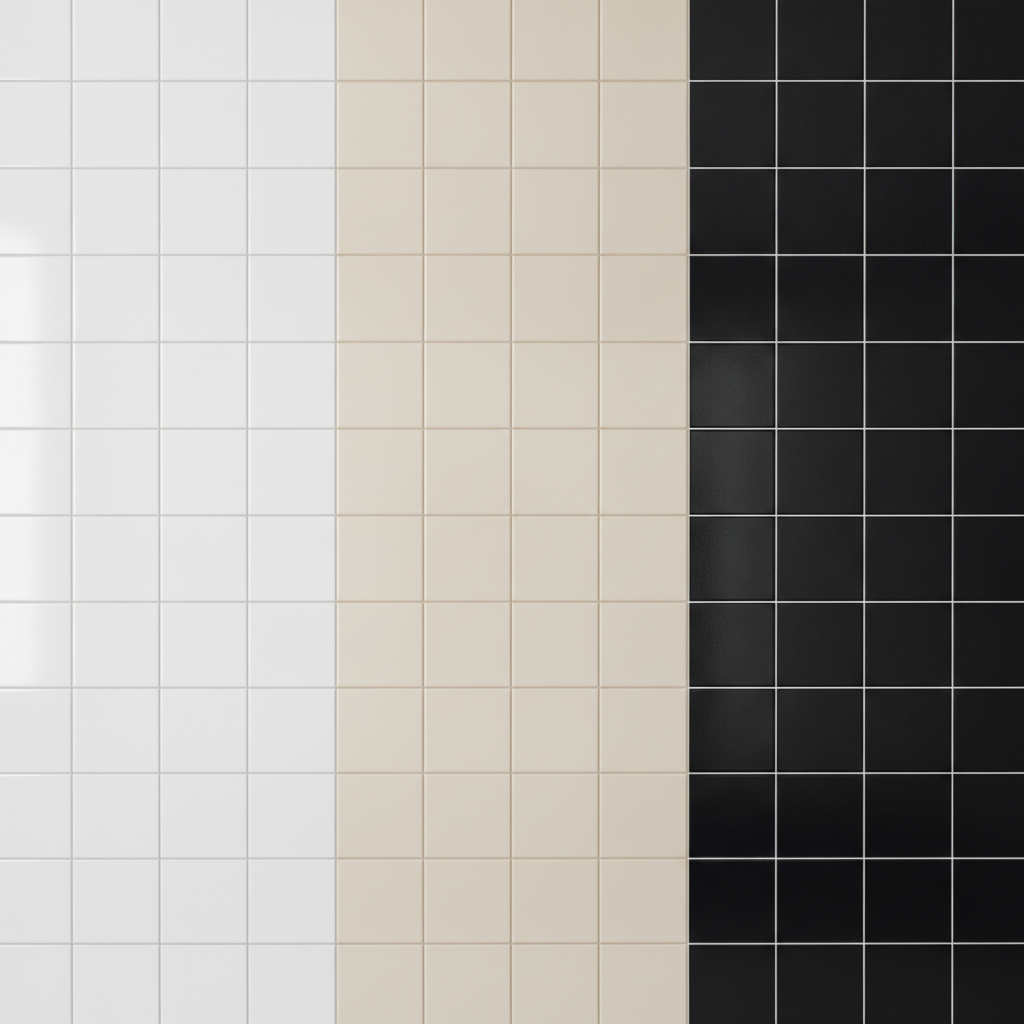
The grout test, delivered backwards, and the most useful mistake in the set. The brief pinned the tiles as identical white in all three bands and asked for one variable to change left to right: the grout colour, pale grey then beige then near-black. The model kept the grout white throughout and repainted the tiles instead — white, beige, black — so the variable moved from the joint to the thing either side of it. The comparison still teaches its lesson, just from the other end: the right-hand band is white grout on black tile, a bright grid drawn over the entire wall, and it is impossible to look at it and still believe grout is a construction detail rather than a design decision. A second attempt, with the tile colour pinned in capital letters, got two of the three bands right and inverted the third one again, so treat this comparison as a way to see contrast rather than a way to preview a specific grout
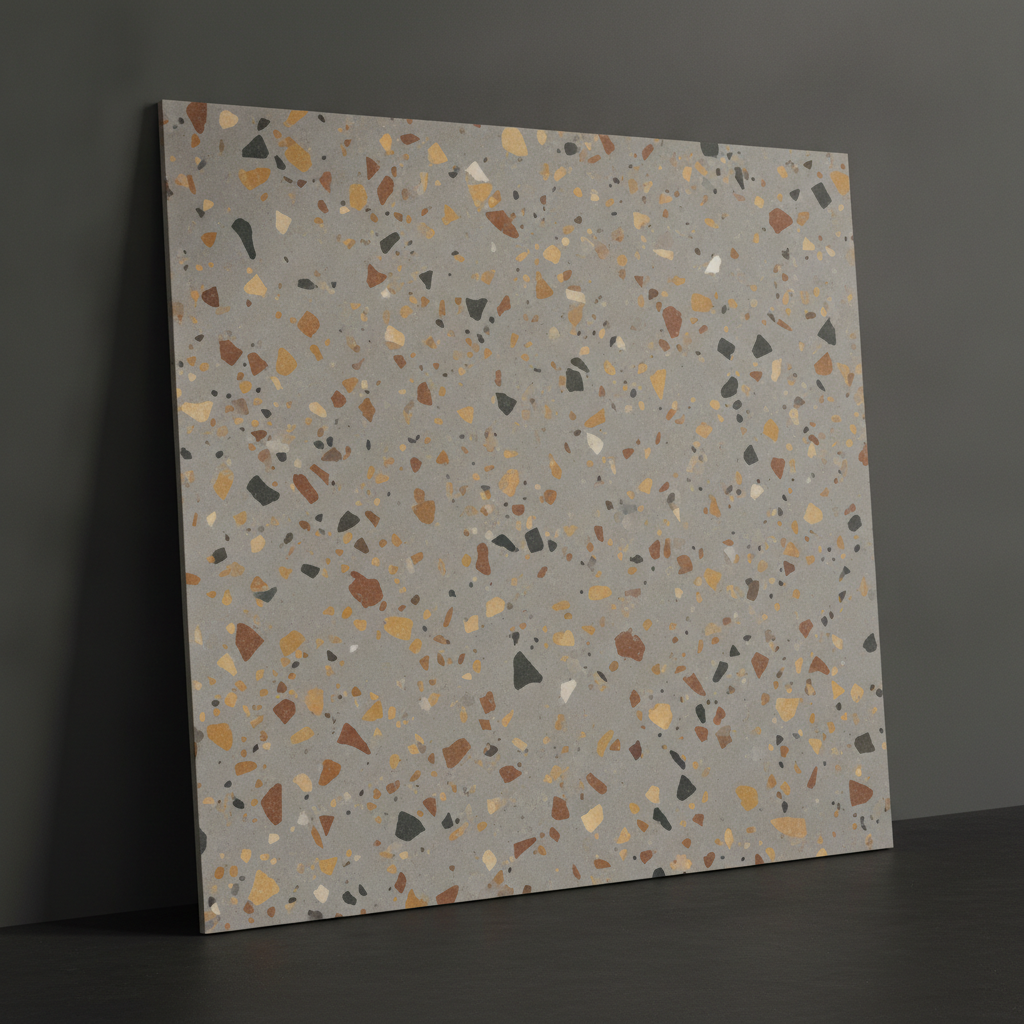
A large terrazzo-look porcelain slab leaning against a dark charcoal wall, chips of ochre, rust and black scattered through a warm grey body. The dark backdrop is doing real work: pale tile photographed against a pale wall disappears, and naming a dark value is the reliable fix. This is also the picture that shows what a tile render can never tell you, which is how big it is. Nothing in the frame sets a scale, so this could be a 30cm square or a 120cm slab, and the difference decides the substrate, the fixing, the number of joints and roughly half the cost. The cut edge facing the camera is drawn far thinner than porcelain of this size would be, and there is a small chip out of the top edge
How the AI Tile Design Generator Works
Pick the tile, not the picture
Gloss herringbone, patterned hexagon, handmade zellige, encaustic cement, a grout comparison or a single sample tile. That first choice decides the body, the format, the price per square metre and whether the thing can be walked on at all — far more than any colour you pick afterwards.
Name the format, finish and the joint
Say the tile size in centimetres, the finish — gloss, matte, satin, textured — the layout, and then the grout colour and width, because the joint is the element that changes a field most and the one everybody forgets to specify. Ask for dark grout explicitly, then check you actually got it.
Take the look, leave the layout
Concepts arrive in about twenty seconds at up to 4K. Use them to settle colour, motif, contrast and how the surface reads at full size, then get the numbers elsewhere: format, thickness, PEI and slip ratings, shade variation, and a setting-out drawing that says where the cuts land.
What a Tile Render Settles, and What It Invents
Six things decide whether a tile design becomes a surface worth living with, and an image carries about two of them well. The unusual part on this product is that the model is excellent at the material and unreliable at the geometry, which is the opposite of what most people assume.
You design a unit and buy a field
Everything else in this series is a single object. Tile is a unit that repeats, so the design only exists once dozens of them are laid together — which is why the encaustic floor above works: its star lives across four tiles, not inside one. A render draws the finished field directly and never gives you the repeating unit underneath, and that unit is the only thing a factory can print.
The joint is the loudest decision
Grout colour changes a wall more than tile colour does. White on white is a soft continuous surface; the same tile with charcoal joints is a drawn lattice. Width follows the tile: about 2mm for rectified porcelain, 3mm for pressed ceramic, 3–5mm for handmade. Expect a render to fudge the joint: the first backsplash here turned near-black grout into thin grey, and the grout comparison repainted the tiles instead.
Scale is invisible in a photograph
Nothing in a tile render tells you the format. The same picture could be a 30cm square or a 120cm slab, and that decides the substrate flatness, the fixing, the number of joints, whether two people are needed to lift it and a large part of the cost. Put a known object in the frame or write the format down beside the image.
The specification lives on a data sheet
Porcelain absorbs under 0.5% water and goes anywhere; ceramic does not. Floors carry a PEI wear rating. Wet floors need a slip rating — R9 to R13, or a DCOF of 0.42 and above. Tile is also sold with a V1–V4 shade variation rating, and outdoors it has to be frost resistant. A render shows a surface, never a rating.
Tiling is mostly edges
The field looks after itself; what your eye judges is where the pattern meets the ceiling, the worktop, the door and the corners. Renders show endless uninterrupted fields and never a cut tile, an external corner or a trim profile — which is precisely the part that separates a good job from an obviously amateur one.
The kiln has opinions about your colour
Custom printed tile is genuinely available now through digital glaze printing, but the glaze is fired at high temperature and colours shift in the oven. A screen cannot preview a fired glaze, so budget for one physical sample round before a batch — and buy the whole job from a single shade lot, because colour drifts between production runs too.
Setting Out and Ordering Tile, in Numbers
The pattern is the enjoyable part and the setting-out is the part that decides whether the finished surface looks deliberate. These are the working rules a tiler applies without thinking about them.
Joint width by tile type
Rectified porcelain, with its edges ground perfectly square, sets at around two millimetres. Pressed ceramic with a slightly rounded cushion edge needs three or more, because the joint is absorbing the size variation. Handmade tile wants three to five and looks wrong any tighter. Floors are generally kept at three millimetres or above whatever the tile allows.
Offset a third, never a half
Long plank and large-format tiles bow very slightly along their length. Offset them by half and the high point of one lands against the low point of its neighbour, which is exactly how you get lippage — a ridge you can feel with a bare foot. Keep any offset to a third of the tile length, or stack them squarely instead.
Set out from the focal point
Start at the wall behind the hob, the shower wall you see from the door, or the centre line of a small room — never in a corner. Put a full tile or a symmetrical pair on that line and let the cuts fall at the ends. Avoid any cut narrower than about a third of a tile; shift the whole layout by half a tile and the sliver disappears.
Order 10–15% over, one batch
Ten percent over the measured area for a straight lay, fifteen for herringbone, diagonals or rooms full of returns and niches. Keep a few spares as attic stock. Above all, check that every box carries the same batch or shade lot number, because fired colour drifts between runs and a second batch shows as a visible band across the finished surface.
Why Use This AI Tile Design Generator
Six builds, not six colourways
A gloss herringbone backsplash, a patterned hexagon floor, a handmade zellige wall, an encaustic cement pattern, a grout comparison and a single sample tile differ in body, format, cost and where they can legally be laid. Switching preset changes what the product is, not what shade it happens to be.
The sample shot built in
One preset stands a single tile against a dark wall with the cut edge facing the camera, so the face, the finish and the body thickness are the subject rather than a styled room. It is the closest thing here to what a supplier photographs, and a standing reminder that the other five are fields the model invented.
A grout test as a preset
Grout colour is the cheapest and most decisive change available on a tiled wall, and almost nobody previews it. One preset puts three grout colours behind identical tiles in a single image so the difference is a glance rather than an argument — and it is honest about the fact that the model sometimes swaps the variable.
Surfaces that read as materials
Nano Banana Pro is genuinely good at glaze: pooled colour at a tile edge, the sheen of a gloss, the chalky flatness of cement, the chips suspended in terrazzo. That is the part of tile selection that samples do best and photographs usually do worst, and it is where this tool earns its place.
Consistent across a whole range
Hold one palette and one finish while changing only the format and layout, and you get a wall tile, a floor tile and a feature panel that read as a single collection rather than three unrelated products — useful for a range presentation, a client scheme or a supplier pitch.
Cheap enough to reject nine ideas
About twenty seconds per concept and plans from $2.99 means you can see nine directions at full field size in an afternoon and throw eight of them away. That is the expensive, slow part of a tiling decision, and it happens before anyone measures a wall or orders a sample.
AI Tile Design Generator FAQ
Related Surface and Interior Design Tools
AI Pattern Generator
The same repeat problem without the kiln. Use it when the surface is printed rather than fired — fabric, paper, packaging — and the pattern only has to meet its own edges, not survive a floor.
AI Bathroom Design Generator
Where to go when the question is the whole room rather than the surface. Fixtures, layout and lighting together, including the light your tile will actually be seen under, which changes it more than most people expect.
AI Kitchen Design Generator
The other room that turns on a tiled surface. Cabinets, worktops and backsplash designed as one scheme, for when the tile has to answer to a countertop and a run of doors rather than stand on its own.
Design Your Tile Now
Six tile builds, glazes that render with the right surface, a grout comparison and a single sample shot with the body thickness visible, all at 4K in about twenty seconds. Free to start, from $2.99 for more.
Start Designing FreeAbout This AI Tile Design Generator
An AI tile design generator is best understood as a tool that answers one half of a tiling decision extremely well and none of the other half, and on this product the line between the two halves is unusually sharp. A tile is four decisions. The first is the surface itself — colour, motif, glaze, finish, and how all of that reads when it covers a whole wall rather than a fifteen-centimetre sample. The second is the joint: grout colour and width, which changes the finished field more than the tile colour does and which almost nobody previews. The third is the specification — body, format, thickness, wear rating, slip rating, shade variation, frost resistance — every bit of which lives on a supplier data sheet. And the fourth is the setting-out: where the pattern starts, where the cuts land, how the edges are finished. This tool settles the first and lets you rehearse the second. The third and fourth are written down beside it, and this page tries to tell you exactly what to write.
What makes tile unlike every other product in this series is that it is a unit that repeats. A poster, a mug, a mirror and a clock are single objects: what you design is what exists. With tile, you design one small thing and then buy several hundred of them, and the design only becomes real once they are laid together — which is why the best image on this page is the encaustic floor, where the star pattern lives across four tiles rather than inside any one of them. That has a direct consequence for how you read every render here. The model paints the finished field, not the repeating unit underneath it, so the tiles are each drawn slightly differently, the stars vary, the hexagons change size partway up the picture, and a wall asked for in herringbone arrives laid as a chevron. None of that survives contact with a factory, which needs a single artwork at the exact face size that meets its own edges perfectly. Judge the surface, and have the repeat drawn properly once the direction is settled.
The second thing worth carrying away is that grout is a design decision and not a construction detail. The same white tile is a soft continuous surface with white joints and a bold drawn lattice with charcoal ones, and the change costs nothing at the point of ordering. This is also where renders are least trustworthy: the first backsplash attempt on this page was asked for near-black grout and returned a thin mid grey, and the dedicated grout comparison changed the tile colour instead of the joint colour, which is a perfect illustration of how casually the model treats the variable you cared about. Ask for the joint explicitly, in strong terms, then check what you actually received before you believe it. And remember that grout is a maintenance choice as well as a visual one — pale grout on a floor or in a shower is a cleaning schedule, which is why mid greys and warm sands dominate in real houses.
Finally, the practical notes, because tile is one of the few surfaces where a decision made from a picture can be genuinely unsafe rather than merely disappointing. A glossy tile that looks superb in a render can be a slip hazard on a wet floor, so wet areas need a stated slip rating — R9 to R13 in Europe, a DCOF of 0.42 or higher in the United States — and floors need a wear rating, which delicate wall glazes do not carry. Order ten to fifteen percent over the measured area depending on the layout, keep some spares, and check that every box shares one batch or shade lot number, because fired colour drifts between production runs and a mixed batch shows as a band across the room. If you are going into production with a custom design, budget one physical sampling round, since glaze colour shifts in the kiln and no screen previews a fired surface accurately. This AI tile design generator runs on Nano Banana Pro, it holds a palette and finish steady across a range so a wall tile, a floor tile and a feature panel read as one collection, it is free to start with paid plans from $2.99, and it turns the slowest part of a tiling decision — imagining forty square metres from a sample the size of a postcard — into six pictures you can react to in an afternoon.